

If you ever thought there must be a better and easier way to train your horse, this training series by Kate Fenner is designed for you!
Each article walks you through specific lessons and how to teach them. From stress-free trailer loading, to handling head-shy horses, to safe mounting. Kate’s gentle and no-fuss approach will provide you with the tools and confidence you need to educate your own horse.
Last month, it was training your horse to lower his head on cue, both on the ground and under saddle. This month, Kate talks about teaching your horse to…
‘Give to the bit’ pressure
People often look at the results of teaching ‘give to the bit’ – a soft round frame and a horse in self-carriage – and tell me they don’t need that because they ‘only want to go trail riding’, ‘don’t do dressage’ or ‘aren’t at that level yet’.
While a horse that is soft in the bridle, travels in frame and maintains self-carriage may look ready to compete at a show, the truth is all of these things are about safety – first and foremost.
‘Give to the bit’ teaches your horse about negative reinforcement – that pressure is released when the horse finds the correct movement. The horse learns it controls the pressure and that pressure, from the bit, legs and seat, will not be unrelenting.
Horses habituate, and even desensitise, to pressure cues very quickly. When pressure is unrelenting, the horse simply learns to tolerate it.
Let’s imagine you ride your horse with a good contact (whatever that might mean) and that it equates to 3-out-of-10 (3/10), with 0 being no rein tension and 10 being the most you can hold…
Once your horse has habituated to a contact level of 3/10, you will need to increase this to get the same result – let’s say to 4/10.
You know where this is going, right?
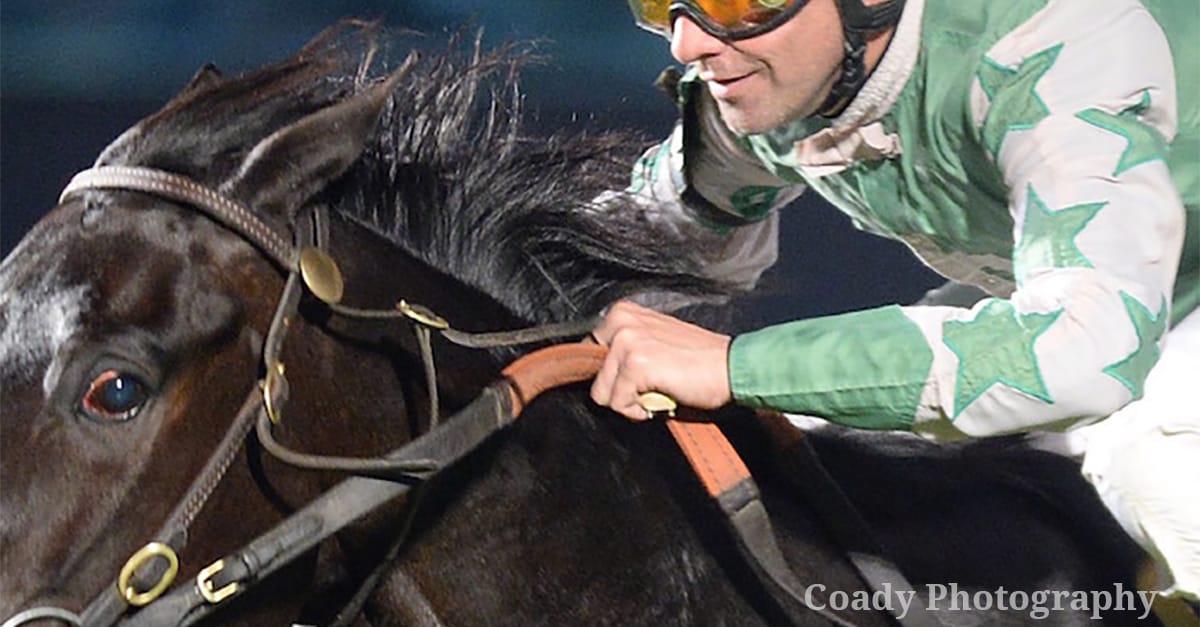
Yes, it’s leading you to that dressage horse, in a double bridle with the rider leaning back and waterskiing, simply to ask the horse to collect back from an extended trot.
As you can imagine, all that bit and leg pressure causes tension in the horse. Just think about that – having pressure from the bit and riders’ legs wrapped around you, as such, relaxation is not going to be easy to achieve.
‘Give to the bit’, on the other hand, is all about relaxation. The release comes when the horse relaxes!
We always need to reward relaxation and start each lesson with a relaxed horse in the Engagement Zone – our bubble of communication (See Part One of this series in the February issue of Horses and People or online here).
‘Give to the bit’ is a great exercise to get your horse there and ready to learn.
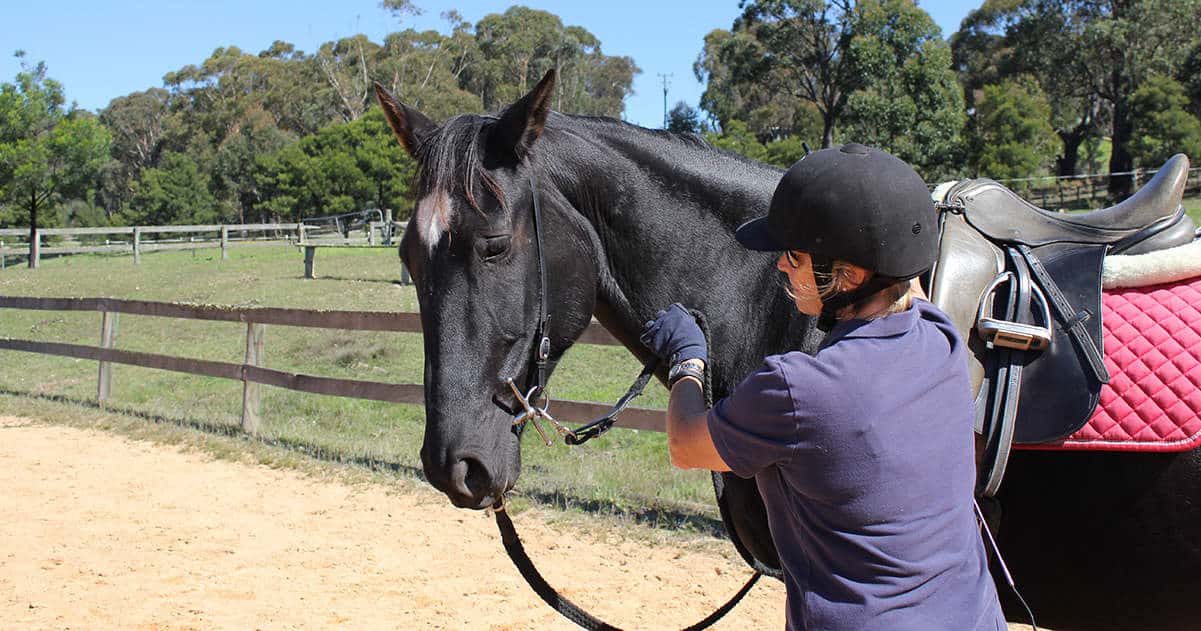
From the ground
Step 1:
Define what we want to move and how we are going to move it.
- Spot: The spot on the horse we are going to move – the nose.
- Direction: The direction is in towards the chest so the nasal plane is just in front of the vertical.
- Motivator: Bit pressure from the rein.
- Reward: Release of pressure and praise – verbal and in the form of a wither scratch.
Step 2:
Decide on the equipment to use.
- A full cheek snaffle bit is useful because the horse feels pressure on the side of the face, producing a clearer signal. The full cheek also has the advantage of not being able to pull through the mouth if the horse decides to open their mouth.
- A dressage whip so the horse can be cued to move forward from the hip, with a tap of the whip. Often, simply lifting the whip will motivate most horses sufficiently. It is important the horse is cued to move forward from behind and not pulled forward with the bridle.
Step 3:
Design the pattern we want to use
- Stand on the left hand side of the horse and hold the left rein in your left hand, no more than 6-12 inches from the bit. The right rein should remain over the horse’s neck and does not need to be held at all, but do make sure it isn’t too long, and risking the horse stepping in or on it.
- Try to hold your rein at the same angle it will be when you are riding. In other words, don’t pull your horse’s head down. Imagine you are sitting in the saddle, sitting up like the queen and carrying your two cups of tea – where would the rein be to give that angle? Hold it there.
- Your right hand, holding the dressage whip, can rest around the wither – in readiness for that scratch that horses find so rewarding, when your horse finds the correct answer to your pressure question.
- Pick up a small amount of constant pressure on the left rein and hold it until the horse ‘gives’ to that pressure. If the horse does not give, then increase the pressure by small increments until they do. Do not release the pressure until the horse moves into it – i.e. gives to the bit.
- Remember the horse has to make the movement, you are not pulling the horse’s head around. This exercise requires animation – the horse has to engage their mind and work out which direction to make the movement. As always, the horse can move in at least six directions and they must learn which one earns the release and praise.
- Try to keep your hand as close as possible to the riding position, about two inches from the neck. You don’t want to move the rein a long way from the neck, nor do you want to touch the neck with the rein as both of these cues will be used later when we teach shoulder control (ISES Training Principle 3: http://equitationscience.com/equitation/principles-of-learning-theory-in-equitation).
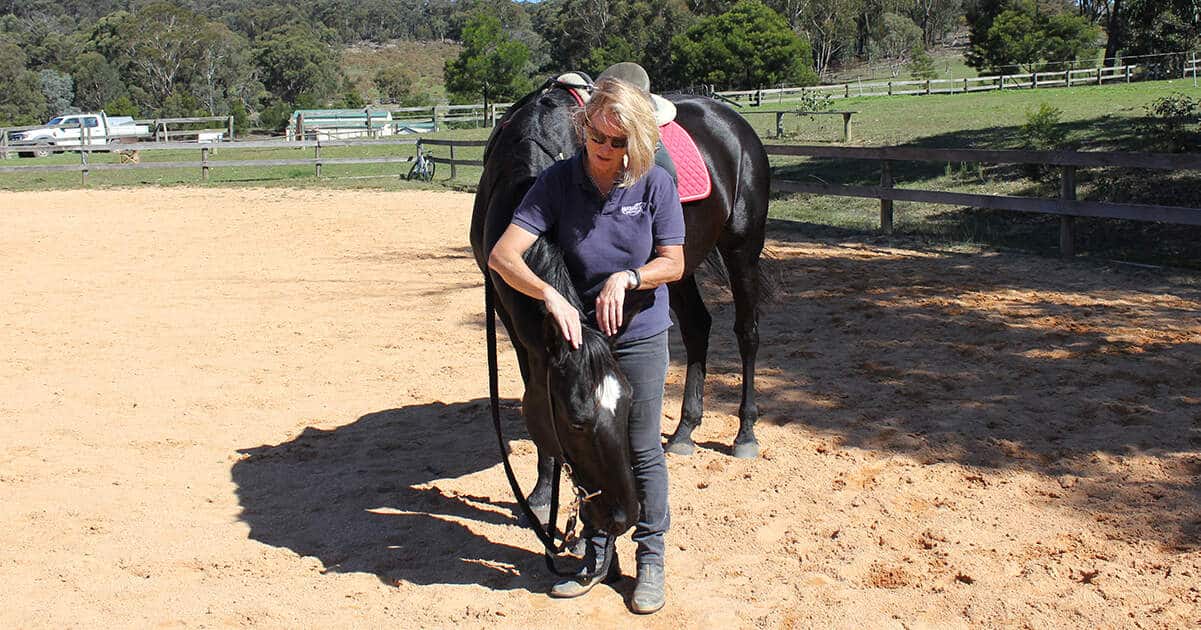
- If, however, your horse is having trouble with the ‘give’ at the beginning, then it is sometimes easier to start with a more lateral movement – more left turn of the head. Once the horse has established the reward is in the ‘give’, you can reward for less head turn. Well done, now you’ve established the pattern – you pick up some pressure, the horse gives (moving their head down, in towards the chest and in front of the vertical), and you release the pressure and reward the horse.
Step 4:
Both sides of the horse.
Go around to the right-hand side of the horse and repeat the process at stand still. If the horse wants to move, then ask for forward movement. You have the dressage whip for that.
Some horses might understand the cue as a back-up signal and you do not want the horse to back up. Gently tap the horse on the hip with the whip to get forward movement or simply allow the horse to stand at this stage.
Remember to hold the right rein in your right hand and leave the left rein over the neck. Most of us are so accustomed to handling horses on the left when on the ground, we feel somewhat uncoordinated when we go to the right. Be patient with yourself! You’ll get there.
Step 5:
Getting moving.
Once you have established the pattern of giving to pressure, you are going to ask the horse to walk circles while giving to the bit.
Once the horse has given to the bit, give your usual verbal cue to walk forward and follow that up with a light tap on the hips with the dressage whip if the horse doesn’t respond.
Don’t worry too much about where your horse walks at the moment, just that they are walking forwards. Try to walk with the horse, with your hand across your chest, so you are both walking forwards and you are not pivoting around on the spot as you’ll get terribly dizzy! We will teach the horse about direction in the shoulder control lessons. Remember… One thing at a time!
Step 6:
Repetition.
Give to the bit quickly becomes an automatic response because the horse learns they can get a release from pressure. The thing to remember is you want the horse to respond from less and less initial pressure.
If you have set up a good pattern and you never surprise your horse with a quick application of pressure, they will soon learn the pattern and begin to respond before too much pressure is applied. Eventually, the horse will respond even before pressure is applied if the pattern has been well executed.
This is a good example of the horse anticipating the pressure to come and responding before it does. This is great when you have established a good pattern and sometimes terrible when you have not!
Step 7:
Putting it all together.
It’s a good idea to change sides often when teaching this lesson as this will help prevent those often little used neck muscles from getting sore. If your horse has not been in work, just do short lessons, about 5 to 10 minutes in length.
As you are going to be changing sides often, it’s a good idea to teach ‘stop’ at the same time. You can find a full video course on teaching ‘stop’ on the website – www.kandooequine.com – together with this video lesson and many more.
Remember, this lesson is all about ‘giving’ – both your horse and you are learning to give. It is teaching you both about negative reinforcement or pressure-release, so it is a great opportunity to teach yourself to release pressure and to release it with the correct timing.
Next time, we continue this lesson by progressing to achieving ‘give to the bit’ under saddle.


Trackbacks/Pingbacks