


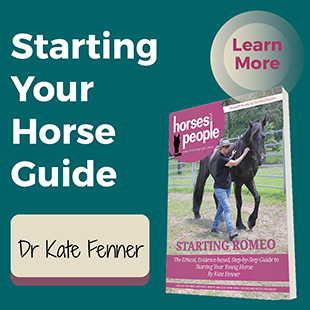
Saddle up! Whether your horse is un-started or already going under saddle, but you feel these are areas that need a little work, you’re in the right place. In this exclusive training series, Kate Fenner from Kandoo Equine is taking us deep into the essential foundation lessons for any horse.
In the last six months of articles on this series, Romeo has learned basic handling, including haltering, grooming, picking up feet, tying up and ‘give to the bit’, both at a standstill and at the walk. He also learnt shoulder control in hand and has been habituated to the girth and saddle cloth. Last month he worked through the long-reining lessons.
This month we’re looking at Romeo’s first saddling lesson. The first saddling lesson will be very straight forward for us because Romeo has already been taught about a girth in the Long-Reining lesson.
This allows us to also do some saddle habituation work with Romeo which will increase his confidence with the saddle and later the rider.
Saddling
You will notice that in all the images, Romeo is standing quietly, unrestrained during the saddling. It is important that your horse can do this because it clearly demonstrates his/her level of relaxation, attention and cognition.
If your horse is not yet ready to be saddled, he/she will not stand and may even leave in a hurry when you approach with the saddle. If your horse is not engaged with you, in the engagement zone, it may well wander off and graze.
Click here to learn more about The Engagement Zone.
Having been habituated to the surcingle, Romeo is already familiar with the girth, so the main purpose of this lesson is to introduce the additional size and weight of the saddle and the stirrups.
Top Tip: Horses repeat the things they practice – those behaviours that give them a release of pressure. If your horse is cantering and bucking during the first saddling then it is likely to repeat that behaviour in the future. It is better if you never encourage your horse to exercise its flight instinct in this way because it’s a behaviour that is very difficult to extinguish.
Step 1:
Always make sure you are using a saddle that fits your horse!
Remove the girth and stirrups and place the saddle on the horse’s back to check the fit.
If you are not very knowledgeable in this area or don’t have access to some guidance (such as the Kandoo Equine Online Training Saddle Fitting Videos: https://www.kandooequine.com/), then I suggest you get a saddle fitter out to do this properly.
One of the biggest and most dangerous mistakes you can make with your horse is to ride, or even sit on, a saddle that doesn’t fit the horse properly – it’s not fair and it’s not worth the risk to you or your horse.
Top Tip: If you feel there is any risk that your horse might become too emotional and kick or buck, attach a long rein to the bridle so that you can keep him/her away from the fence. Of course, this shouldn’t happen as your horse has been worked in a girth when long-reining and if they do react then I suggest you go back a step and long-rein for a few minutes before continuing with the lesson.
Step 2:
With your horse bridled, in a safe enclosure, place the saddle cloth and saddle on its back. Go around to the offside (the right side) to lower the girth. Coming back to the near side, fasten the girth. Be sure to do the first buckle up securely enough to hold the saddle in position should your horse move off.
Reward your horse for standing with a scratch and quiet word, and complete fastening the saddle. Do this slowly, praising the horse for standing with each increase in tightness.
Your horse is learning a new pattern – stand and be praised while being saddled. It’s an important and easy habit to establish when you are careful to fasten the girth slowly and remain attentive to your horse’s emotional level.
If your horse does move off at this point, then it’s likely that he/she received inadequate habituation work in the Long-Reining session, so go back a step and revisit that lesson.
Step 3:
Cue your horse to move away from you and around the yard at walk in both directions. Here Romeo is working around the pen without the aid of a long line to hold him off the fence. This is because he became well-habituated to the girth with the long-reining lessons. However, if you feel that your horse might be more emotional than Romeo and be likely to kick out, then I suggest you attach a long line to the bit as you did in the Long-Reining lesson. This will keep your horse from kicking the fence and greatly reduce the risk of them injuring themselves.
Once your horse is walking calmly in both directions, ask him/her up to trot. You don’t need a power trot; a gentle jog will do at this stage.
I do not suggest you ask your horse to canter at this stage, as it may encourage kicking or bucking. In these early stages, canter is best done on the long-reins.
Step 4:
Now that your horse is relaxed and travelling around the pen at trot, we’re going to make the exercise a little more challenging.
Attach a long rein to the left hand side of the bit, if you haven’t done so already.
Next, thread a lariat or stiff rope through the left stirrup, holding the long line in your left hand and both ends of the lariat in your right. Ask your horse to move around you in a small (10-15 metre) circle.
Flap the stirrup up and down using the lariat. Start very gently and, if your horse remains relaxed, increase the movement.
You’ll know your horse is relaxed enough if it is not increasing speed before asked and not looking around at the stirrup.
If this is not the case, keep your horse in walk, the circle around you small and allow the horse time to process the lesson. You should see your horse settle within a few minutes and then you can make the circle bigger and move up to trot.
Step 5:
Aim to do this at walk and trot, from both sides. While your horse is travelling around, put some pressure on the lariat and allow the horse to feel that new sensation. You can move the stirrup in five directions – up and down, back towards the flank and forwards towards the shoulder as well as towards you.
This exercise will help habituate your horse to your moving leg when riding and the feel of your weight moving in the saddle. Begin with small movements and gradually increase their range.
When pulling the stirrup towards you, to simulate weight in the saddle, be sure to also start with a gentle movement (and a well-fitted saddle, as mentioned earlier.
Top Tip: This is a great time to practice your verbal cues and walk-trot transitions. Your horse is more likely to increase speed and become anxious if allowed to simply trot in one direction and not transition back and forth from walk. By practicing your transitions, you are better able to maintain horse horse’s attention and keep him/her in the engagement zone. You will, of course, also reap huge benefits from establishing these verbal cues once you are ready to ride.
Step 6:
To further habituate your horse to the saddle and sensations around the saddle area, now is an opportune time to do some tarpaulin habituation work.
Just as when we habituated the horse to the long lines, we want to break this new habituation lesson down in the same way. The aim is to have the horse in the engagement zone, attentive and listening, not fearful or wanting to leave.
Tarpaulins are large, mobile and noisy – not exactly most horse’s favourite things. The smaller you can make the tarpaulin, by rolling or folding it up, the easier this lesson will be in the beginning.
Start with a small tarpaulin, or rolled large one, and rub the horse with it. This is the same lesson as we have done before when habituating Romeo to any new equipment or sensation. As your horse settles with this small object, gradually increase its size and your range of motion.
Step 7:
Gradually make the tarp larger. If your horse has worn a rug in the past, this may be an easy lesson for him/her. If not, it may be more challenging.
It’s important that you don’t, at any stage, tie the tarpaulin to the horse. When you are ready to drape the tarpaulin over the horse, cue the horse to move around you in a small circle, keeping the tarpaulin in easy reach should it be necessary to remove at any stage.
Step 8:
Once your horse is relaxed with this exercise, place part of the tarpaulin under the saddle flap and increase the size of your circle.
Again, never tie the tarpaulin to your horse or the saddle because if you have misjudged your horse’s emotional level then this can become very dangerous, very fast.
Attaching an additional long line to the tarpaulin will help you remove it quickly, should you need to.
Cue your horse to walk and trot around you carrying the tarpaulin partially tucked under the saddle flap. I like to have it hanging quite low as this helps to habituate the horse to feeling objects around the legs.
The tarpaulin may slide to the ground from time to time and again, this helps to habituate the horse to a new feeling, sound and sight, all of which is useful foundation work.
Next month we’ll be saddling up and mounting!
Learn more… Read more about habituation and, particularly, about systematic desensitisation in the article by Dr Andrew McLean, also in this issue.
To watch this month’s video lesson including the tarpaulin habituation work, click here: https://www.kandooequine.com/blog/romeo-saddle-up.
This article was published in Horses and People September 2018 magazine or buy the whole series as an e-book.


Trackbacks/Pingbacks