
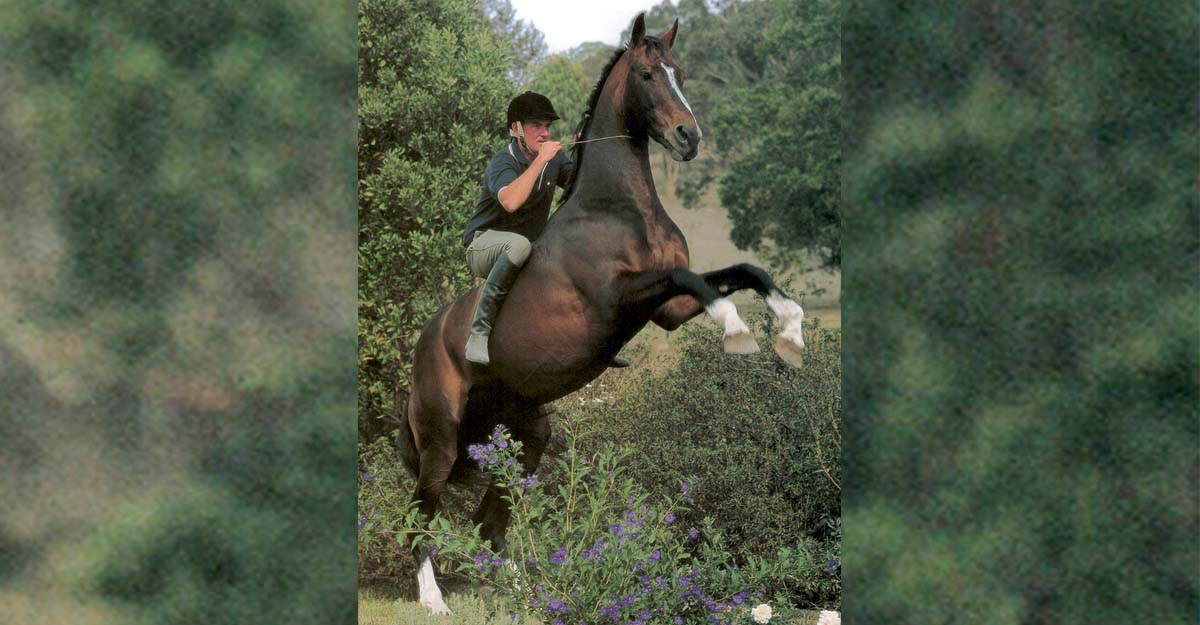

At the 1998 Equitana, my husband, Dr Andrew McLean, decided he would demonstrate riding bridle-less, with a rope around the neck of the stallion Tintagel Magic. At the time, Andrew was competing Magic in dressage at Advanced and Prix St George level, and managed to train him to respond to the rope signals in just two days! And Magic was more collected and softer when ridden in the rope than in the bridle and saddle.
This got me thinking that the neck rope was not just a trick but could, in fact, be a great aid in developing every horse’s lightness and collection!
Andrew began his demo with bridle and saddle and was demonstrating the aids and the responses, and how they were involved in developing the movements required to compete at that level. He finished by riding Magic with the rope, demonstrating those same responses without a bit or reins, just a rope around the horse’s neck and bareback, of course!
It was a few years later when I challenged myself to ride my little stallion Da Vinity (Vinnie) in the rope, and really it was only to say that I could! And, while I never had the nerve to ride without a bridle altogether, I did end up being able to ride him bareback with a rope, the bridle was on and the reins looped around his neck – just in case.
Vinnie wasn’t that easy to ride in general, quite distracted by the environment and so a bit tense, with a tendency to lean on the bit and become difficult in the contact. When riding with the rope, I rode many transitions using the rope to stop or step back and, before long, he learned that the rope pressure was the brake and he began to relax his back.
The change in his way of going was remarkable. Once Vinnie had learned to stop from the rope, we had developed a great rhythm – and hey, I could ride with no reins!
I then taught him to turn with the rope and found that he really was much lighter and more uphill; I could feel his crookedness more; and it increased my own stability and strength.
As we became straighter, Vinnie became more elevated, lighter and more balanced. I could eventually ride all the movements including half pass, medium trot and flying changes better than before.
I used the rope to help me get better balance when riding bareback as could feel how he would unbalance me with the base of his neck; he pulled me crooked.
Vinnie was definitely on the forehand and more on one side than the other. The rope had helped me lift his forehand so that he did not drag me forward and down or even sideways.
Since then, I have found that riding with a rope around the horse’s neck can be used to improve rider position and posture, but also to improve horse posture, lightness of the forehand and balance. And I see no reason why it would not work for you!
For example, Ingrid Klimke rides her horse with a rope sometimes too, and Alizé Froment is a well-known rider displaying dressage in a neck-rope.
You can look at this as another way to cross-train and keep life fun for you and your horse. You don’t ever have to ride bridle-less or bareback of course, but sometimes it is fun to do so!
Training a horse to respond to the pressure of the rope is like training any response; it is all about the release of pressure when they give the desired response. So, in this article, I will break down the training and explain how you can teach your horse to respond to the neck rope in a safe and reliable way.
You can begin rope training on the ground first. When you begin riding with a rope, it is prudent to have the bridle on as well, for your own safety just in case things go wrong. If the horse fails to respond to the rope to stop then you can pick up the reins and revert to to using the rein aid your horse already knows.

Hand position holding the neck rope – the rope is held between the thumb and forefinger at the top, as the rider would hold the reins. Image courtesy of Equitation Science International.
What type of rope can you use?
‘Softhands Equine’ makes one of the most practical neck ropes on the market. It can be lengthened or shortened according to the size of the horse, it comes in various thicknesses so that it is comfortable in your hand, and it comes in many pretty colours too as you can see in the images on these pages.
In the past, we have also made our own with their own special little handles. This is like the one Andrew used for his demo.
I personally have found the stiffer ones (rawhide) difficult to use with reins, but good otherwise.
Fitting and holding the rope
Position the rope around the horse’s neck so that when sitting in the saddle, you can hold it with a bent elbow holding the rope between your fingers like reins.
Pick up the reins as you would do normally and then pick up the rope so that the rope goes under your ring finger and the reins are under your little finger. Your reins can remain soft but within reach to use and the rope pressure is applied through the ring fingers.
Training a step-back
It’s important to start with training a step-back, as this is a way of strengthening the horse’s response to the aid for stop.
Training the horse to step-back from the rope can be done on the ground, before riding. Facing in the same direction as the horse, apply an upward pressure on the rope vibrating it against the under-side of the horse’s neck until he/she takes a step back. As soon as the horse has stepped back 1-2 steps release the rope pressure.
Remember to praise the horse for the response with a good scratch just near the wither region.
Repeat the signal of the rope about 5-7 times until the horse steps back from a light touch of the rope. Use vibrations if there is a tendency for the horse to delay responding at any time.

As with all training, it is important to regularly check for self-carriage – the rider should be able to release the contact and the horse should stay the same. Image courtesy of Equitation Science International.
Aim for a second set of repetitions 3-5 times and a third set 1-3 times to train your horse to respond immediately from a light touch of the rope on the under-neck. These three sets of repetitions help train any response.
When your horse begins to respond from a touch of the rope upwards, then it is time to improve the second step of the backwards response, by vibrating the rope if he/she is slow to respond.
This second step helps develop the tempo and rhythm of the step back and if the response is delayed, you will notice the horse leaning on the rope and going backwards crookedly.
If the horse drifts backwards to the left, then it is a sign that the left foreleg and right hind leg are slow in the backward response. Vibrations of the rope to quicken the backward action of the left foreleg, as it is about to back, will improve the straightness of backing.
Once the horse will back 2 good steps from a light upward touch of the rope, he/she will offer more steps of back.
The same principle is used when training the horse to back under-saddle. Train the signal of the rope under-saddle with the bridle on initially, this is so that if there is no response from the rope, then the reins can help.
Aim for an obedient step back of 1-2 steps, so that the response is immediate and from a light aid. Use 3 sets of repetitions to develop a rhythm.
Once responding obediently, you will often find that the horse will offer a third step. This is the time when the tempo of backing can be quickened using a stronger vibration at the second step of the back response.
I have found some very interesting results using the rope to improve the back response of many horses, particularly those who are difficult to back using the reins. It is just a different method or technique and may suit some horses, especially, if there have had negative associations with the use of the bit.
Some of the benefits include:
- Lighter to respond to the rope to back than the rein aids
- A more elevated rein back, the hindquarters lower during the back response
- Less pulling downwards with the neck and bracing in the jaw
- It can be used to improve the response of backing
- Improves straightness in rein back because you feel the neck pull down when the horse is crooked

Step-back from rope signal. The rider lifts the rope upwards until the horse takes a single step back, and released to contact level (lightly touching the neck). Image courtesy of Equitation Science International.

The neck rope can help to stabilise the seat of the rider in rising trot, by lifting up to rise and sit. Image courtesy of Equitation Science International.
Using the rope to stop
When you have taught your horse to back, you have actually started to train the stop as well, because the horse uses the same muscles and biomechanics to step-back and stop, so for the horse, the physical response is the same.
The horse should ideally stop or do a downward transition without pulling down or bending the neck during the transition. The rope is used in the same way as it is used for back, to stop: an upward lift or touch of the rope on the under-neck.
Again, it is best to have a bridle on initially when training with the rope for safety reasons. Some horses will pull against the rope and then will not stop!
In walk use an upward pressure on the rope to stop. Any delay or heaviness is felt through the under-neck, brachiocephalic muscles, and of course a slow response. Repeat walk to halt transitions until your horse has learned to stop immediately and lightly from a touch of the rope.
Remember to introduce your postural cue before and during the rope aid. Engage your core (make below your belly button strong), stop your seat moving, and engage your shoulder blades as you stop. Breathing out during the transition is also very useful.
You should now feel confident to ride in walk with a light contact on the rope against the under-neck muscles. If the horse leans on the rope and quickens, ask for a downward transition. If the horse leans and slows then ask for an upward transition of a quicker gait. The horse has to learn to carry their head and neck without leaning.
Slowing the tempo of the horse with the rope is similar to stopping, but the rider can close the thighs toward the saddle as a cue to differentiate the response to slow from that of stopping.
It is important to always use an upward pressure on the rope, vibrating it if necessary, on the under-neck. This way the horse learns to respond from touches of the rope. If you use a pull, you train a pull. If the horse is persistently dragging down on the rope, then raise it up his neck where he is a little more sensitive.
When beginning to trot, ride a short distance in trot and then ask for a downward transition to walk. Repeat these transitions until the horse responds well to the rope before continuing in trot. When cantering, ride trot transitions. Transitions create lightness and rhythm and are a regular reminder to the horse of what the rope means.
Some of the benefits that occur as a result of using the rope to stop are that:
- The horse learns to stop by lifting the forehand
- The fore legs of the horse become more elevated because the brachiocephalic muscle aids in elevating the forelegs of the horse
- When the forehand is elevated, the hindquarters are able to step more under
- The horse becomes straighter, the under-neck is even on both sides and he becomes more upright
The rope is used in this way for all downward transitions. Postural cues or verbal cues should be used just before and during the use of the rope for the transition.

Hand position holding the neck rope – the rope is held between the thumb and forefinger at the top, as the rider would hold the reins. Image courtesy of Equitation Science International.
Training turn from the rope
To turn the horse, the rope is positioned to one side or the other, so that both hands go right or left. One side of the rope becomes the indirect turn and the other, the direct turn. The side of the rope against the horse’s neck in the turn becomes the indirect turn and the one away from the neck the direct turn. The rope can be vibrated one way or the other if the horse does not respond.
If a horse has a tendency to be on the forehand in the turns or falls in or out, the action of the rope on the sides of the neck will help to straighten the horse.
Vertical flexion will begin to occur as the horse relaxes his neck and a light contact is kept on the under-neck. Lateral flexion can be trained by lifting the rope a little on the side that the flexion is required.
The benefits of the rope in turning include:
- The neck becomes straighter in the turn
- Changes in the straightness of the horse’s neck and shoulders are felt through the bottom of the rope
- The rope can be used in pirouettes to help lift the shoulders in the turn
- Lateral work feels lighter and off the forehand
The training of all of the responses from the rope can be done with the bridle on initially. The responses to the rope signals will initially be fairly rudimentary but with repetition they become more obedient. When then paired with postural cues, the responses become on a ‘contact’, where the rope is always in contact with the neck but not strongly.
Benefits for the rider and horse
For the rider, riding with the rope helps train the rider to have an improved posture. The technique of lifting the rope helps the rider to lower the elbows and engage the latissimus muscles and keep the back straight especially in downward transitions. The rider also learns not to pull back on the rope but to keep the arms forward and to keep the thumbs on top of the reins.
Riders who pull, end up training horses to pull too, and this will cause neck shortening as well as bracing in the neck, particularly through the brachiocephalic muscles and setting the jaw. When using a bridle, vibrating or sponging the reins upwards along the horse’s tongue are good techniques to improve lightness. For a difficult problem where the horse is afraid of the bit, then the rope can be useful in retraining the stop response.
If a horse has learnt to brace against the bit through the neck and jaw, the rope can be used to help him or her find a better posture. Since there is no pressure on the tongue or bars of the lower jaw with the rope, the downward transition posture will change for the better as the horse elevates the neck from the base of the chest.
As the horse learns to switch-on the sling muscles of the shoulders, the shoulders become free to elevate without the pressure of the bit and can lift the forehand allowing the hindquarters to step under for collection. The bridle can be reintroduced later, but the posture remains, as the rope helps the horse learn not to lean on the bit.
Improving rider balance
A neck rope should be used by children for safety and to stop them pulling on the horse’s mouth when learning to balance, and I have used the rope with the bridle in many situations to help adult riders improve both, their own balance and control of their horses.
In this situation, I don’t train any response from the rope but use it for the rider to balance with, rather than interfering with the horse’s mouth. The rope keeps the riders’ hands in a more forward position, the reins are shorter but still with a light contact, and when held with the rope they are more effective in delivering the aids as there is a closer connection to the horse’s mouth.
Often the rider’s reins are too long, which will make rein aids more abrupt as there is no contact, or there will be a delay or resistance in the horse’s mouth or body to the reins.
A rider can use the rope in upward transitions to keep the hands forward and not interfere with the horse’s neck. Many resistances in upward transitions occur because a rider pulls back.
This is also the case in downward transitions, the rider can again pull upwards on the rope, lower the elbows and close the fingers on the reins.
There is also a postural cue through the rider’s core such as breathing out or pulling their belly button backwards to soften and strengthen through the lower back. Pulling back with the hands can cause shortening of the horse’s neck, opening of the mouth or bracing in the under-neck.
Keeping the hands forward is important in rising trot, as the rise of the rider should be upward and forward between the elbows. When a rider has difficulty rising to the trot then the rope can be used to help. The rider needs to pull up on it to rise and also pull up on it to sit so that they don’t collapse down. This is particularly useful if a horse has poor rhythm, as the rider’s seat can help to maintain it with its regular action.
Using the rope in this manner also helps riders in sitting trot and canter too by stabilizing the seat in the saddle, enabling them to feel the movement of the horse’s back without pulling back on the reins.
Training postural cues
Training postural cues (traditionally known as ‘seat’ aids) is done using the process of classical conditioning. This means that the postural cue you wish the horse to learn, must be done just before and during the physical aid of the reins or rope for them to be learned by the horse.
The cues used should be obvious to the horse too, for example, a downward transition cue of breathing out is quite subtle and in a difficult situation may not be obvious enough. However, a cue such as closing the thighs together to slow the tempo or to stop, is a bit more obvious to the horse.
If riding with a saddle, then weight aids can be used as cues. Weight aids are used in turns, particularly in sports such as polo, games or western riding, where the rider leans one way or the other to turn. Dressage turn cues are more subtle; the rider turns the upper body in the direction of a turn and can also press a thigh into the saddle. For example, to turn to the right the rider will look right, turn their shoulders and press with the left thigh.
Weight aids are also used in downward transitions; the weight is increased in the stirrups, by pushing down through the balls of the feet or, by pushing forward and down, as in a western sliding stop.
These weight aids are felt by the horse as pressure through the stirrup bars, not as an increase in the rider’s weight, although there may be transference of weight toward the front or back of the saddle through the rider’s seat and body. You cannot be any heavier than what you are, but you can push into the stirrups or lean in a direction to produce a weight aid.
Other cues that could be used are pressures on the top or sides of the neck or pulling (a little!) on the mane. And don’t forget the verbal cues as well. Horses have acute hearing, so our cues need to be audible but also said in the same way each time to be learned. It is the vowel sounds that horses learn best of all, not so much the consonant sounds.
As riders, we can be quite innovative deciding what cue is for what response. Where we can go wrong is that we become inconsistent with our cues in quite a few ways.
Remember these rules:
- Choose one cue for one response
- Always use the cue before and during the response
- Try not to repeat the cue but rather add the learned rein, leg or rope aids
- Aim that the horse responds to the cue in 3 steps
- Delays in responding to a cue will cause inconsistency and a loss of learning
- Because neck-rope cues are subtle, it is important to be ready to revert to using the pressure aid when necessary.
If you are absolutely consistent in your training and have a horse that responds immediately and lightly from all cues and, of course, the aids you use, then you may just about be able to one day ride bridle-less or even rope-less.
Performers who do ‘show-off’ riding without a bridle or rope, will generally tune their horses up before a performance with the reins on a bridle or halter and/or with a rope. This is so that the horse is totally obedient and will not falter in the display.
And that’s about it! It is now up to you to decide if a neck rope will help you – either improve yourself, improve your horse, or both. And to design a step-by-step training plan that will make sense to your horse and keep you both safe!


Hello Manuela,
Thanks to an exchange of emails today with Cristina Wilkins I have just become aware of this most excellent article of yours, published last year. Many congratulations and thanks for such a valuable contribution. I know that I will be referring back to this wonderful resource article again and again and sharing it with others. Michelle Guillot, whom you probably know, has been using a neck rope exclusively on her horse Jack for the last 6 months or more and she loves it. Her trainer now uses Jack with a neck rope to introduce young children to riding!
Strangely, only this morning, I sent a short piece of mine to Andrew but it was not transmitted. I must have used an email address that is no longer valid. If you would like to give me his current address I will post the item again. It may be of interest in connection with the ‘Quit Horsing Around’ seminar that starts tomorrow.
Thanks again for such a very helpful article.
Kind regards
Bob